

Windows Virtual Desktop is a desktop and application virtualization service that runs in Microsoft Azure. It can be used to provide virtual desktop infrastructure (VDI) or Remote Desktop Services (RDS). VDI will present each user with a dedicated virtual machine in Azure, whereas RDS can be used for multi-session virtual desktops or Remote Apps.
The service is highly scalable, designed to be deployed in minutes and available on any device. Windows Virtual Desktop makes it possible to migrate your RDS environment to the cloud and simplify management. You do not need to manage the brokers and gateways as with an on premise environment.
WVD supports bringing a custom image or using a template from Azure. Here i will walk you through the deployment process, lets get started.
Windows Virtual Desktop Setup:
Grant Azure Active Directory permissions to the Windows Virtual Desktop Preview service:
Go to the Windows Virtual Desktop consent page.
Select Server App. (Note you will need to do this a second time for the Client App.)
Here you will need to enter your AAD Tenant GUID or Name. I was able to enter my domain name that is linked with my Azure Tenant and is a Global Administrator. Click Submit.

Accept the agreement giving Windows Virtual Desktop Access.

Go back to Windows Virtual Desktop consent page.
Do the same steps to Accept access for the client app.
Assign the TenantCreator application role to a user in your Azure Active Directory tenant:
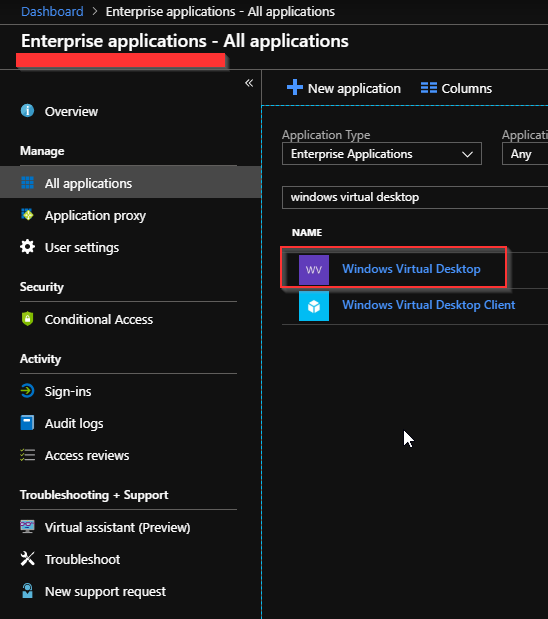
Login to the Azure Portal.
Search Enterprise Applications > All Applications > Windows Virtual Desktop.
Next go to users and groups and click Add User.
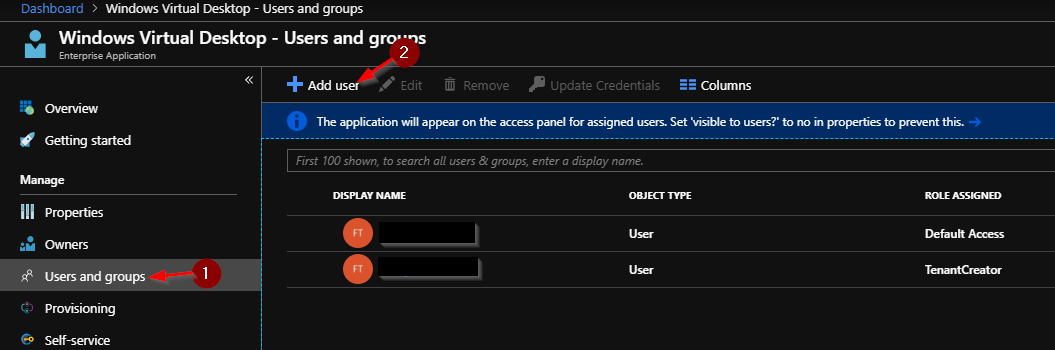
Select the desired user, select role TenanatCreator and click Assign.
- For simplicity, this can be the global administrator account. (*From Microsoft’s Documentation*)
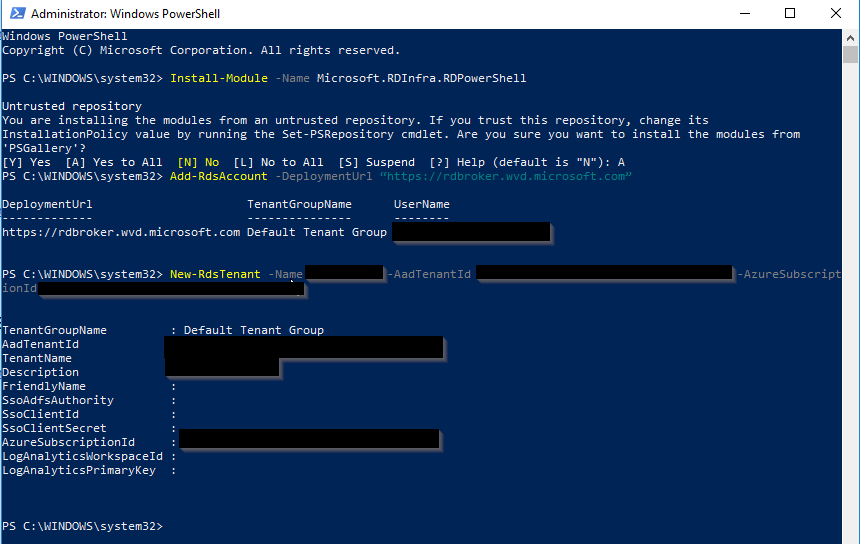
Create a Windows Virtual Desktop Preview tenant:
Run Powershell as Administrator.
Run:
Next Run:
The next command you will create the tenant so you need your
Subscription ID: Can be found in the Azure Portal under Subscriptions.
Tenant ID: Can be found in the Azure portal click the ? in the top right then select show diagnostics. It will download a json file you can open with notepad and find the Tenant ID.
Run Command:
*Replace with your respective IDs and Name.
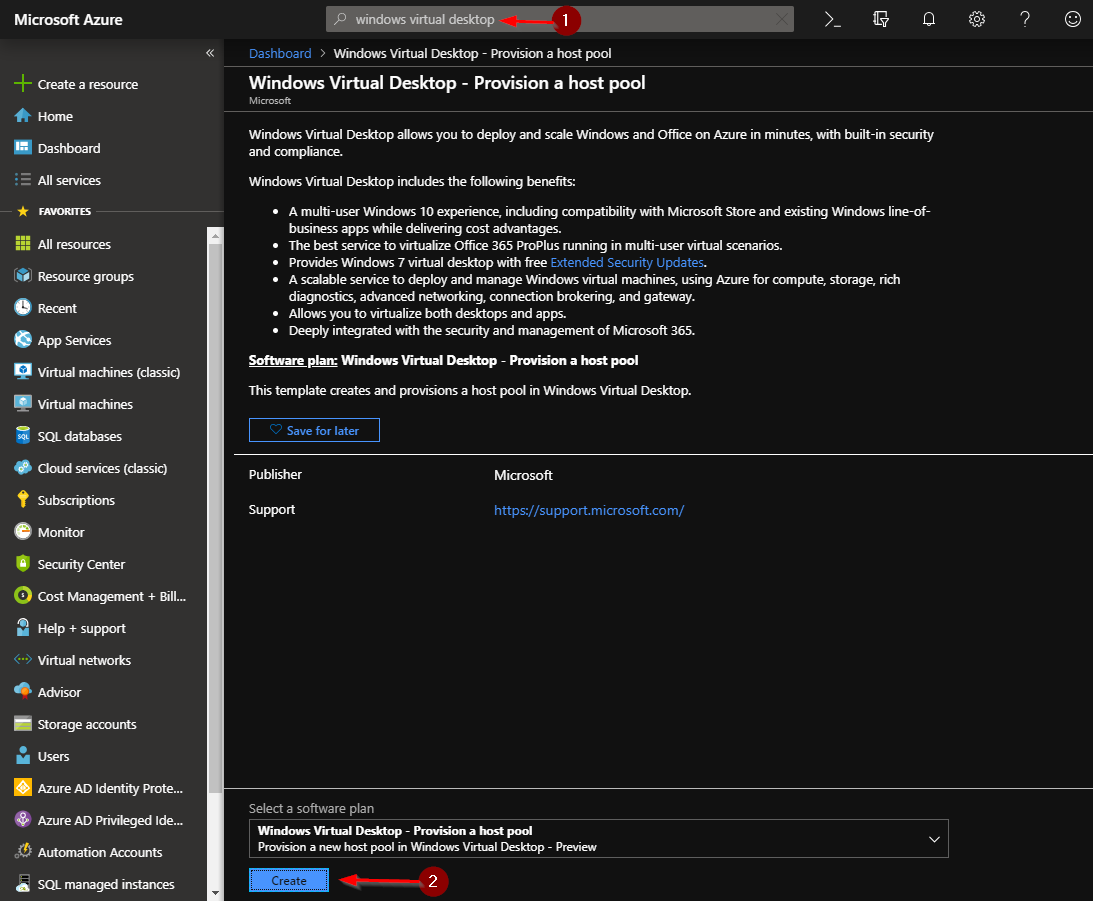
Create Windows Virtual Desktop Host Pool:
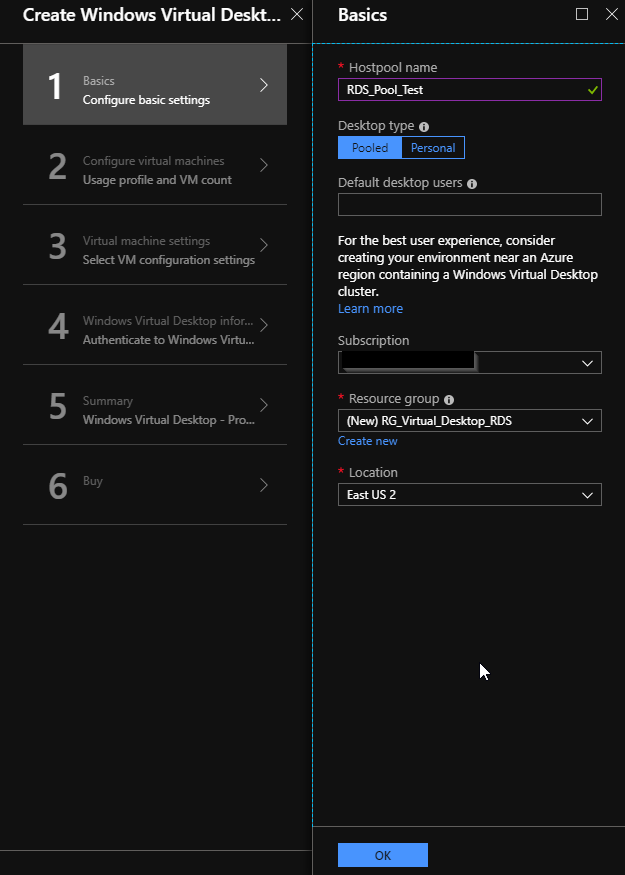
Search for Windows Virtual Desktop – Provision a host pool. Click Create.
Enter the Hostpool name.
Desktop type: Pooled will share the resources and direct users to the best available session host. Personal will force each user to their own virtual machine (Careful this can be very expensive however may be needed with some resource intensive applications.)
Default desktop users: Here you can add users to be added to the desktop app group for the host pool. Comma separated if multiple users will be added.
Subscription: select the subscription to add the host pool.
Resource Group: select an empty Resoure Group or create a new one.
Location: Select location: Preview is currently available in Central US and East US 2.

Click Ok.
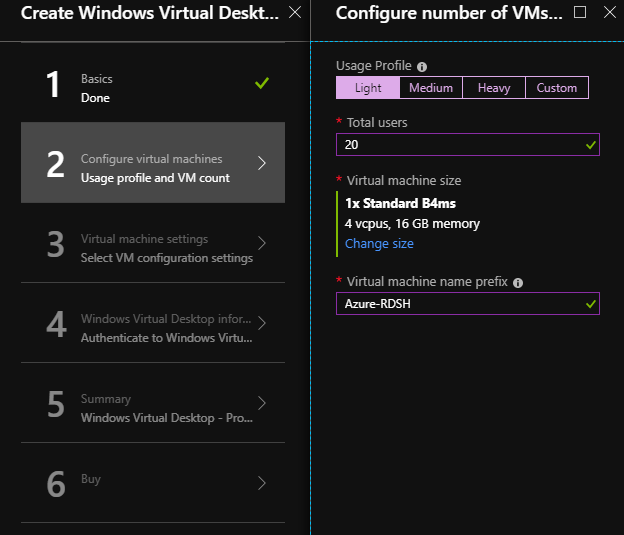
Next select the usage profile which will determine how many users per vCPU.
Total Users: enter the max user number that will use your pool. This with the usage profile selected with give you a recommended virtual machine type and count. For testing I am scaling back to a cheaper B Class machine.
Virtual Machine Name Prefix: Enter the prefix for your naming structure. I selected Azure-RDS so the host computers would be spun up with names Azure-RDS-0, Azure-RDS-1…
Next select your
Image Source: This can be a Managed custom image you captured and uploaded to blob storage. NOTE: must be in VHD format and a generation 1 virtual machine with static drives. There are preparation steps to the image found here. For ease i will select a gallery image for my demo.
Disk Type: HDD or SDD
AD Domain Join UPN: account that has permissions to domain join machines.
Virtual Network and Subnet: Select a network that can access your domain and subnet. I created a special subnet just for the new Virtual Desktop Hosts.

Next fill in the Windows Virtual Desktop tenant group name, the tenant name from earlier steps we did in Powershell.
Enter the user account for the tenant RDS Owner. Note: this cannot be an account setup for MFA.
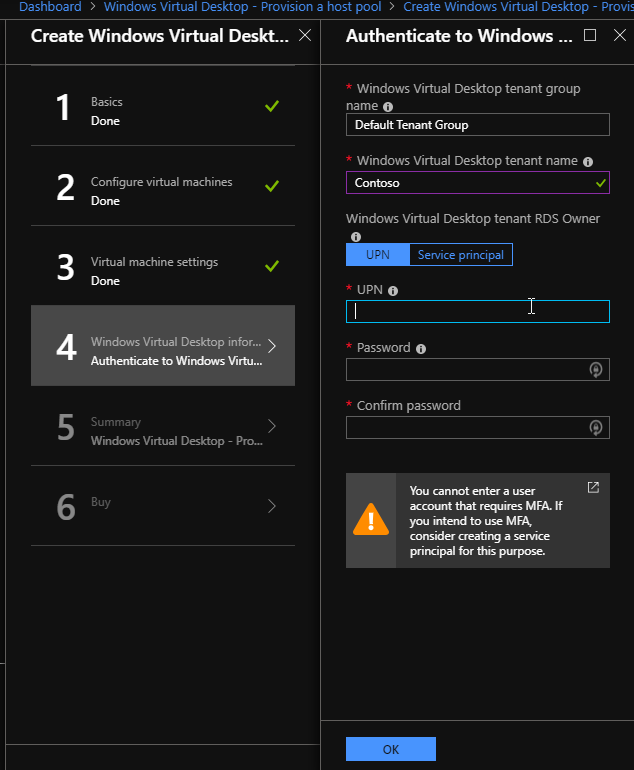
Click Ok, it will run a summary and verification.
Click Create. Will take some time but you should get a successful message when completed.
Connecting to Windows Virtual Desktop:
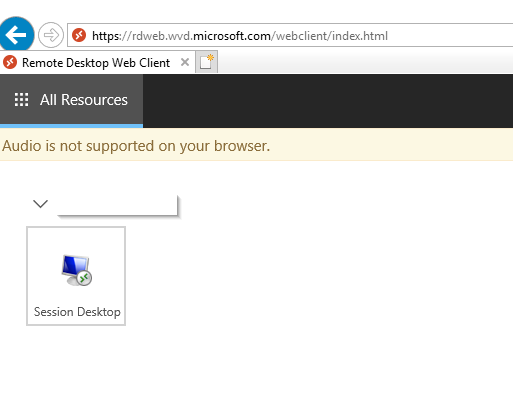
You should now be able to connect. You can access it through the web client from https://rdweb.wvd.microsoft.com/webclient
WVD can also be deployed as an enterprise Azure application to myapps.microsoft.com
Launch Session Desktop.
NOTE: If you are setting up RemoteApps and not a full desktop you can publish out apps using the powershell commands found here.
By default Windows Virtual Desktop creates the group to publish a full desktop, to add users do the following command.
You are now connected and have setup Windows Virtual Desktops!
ADFS/Single-Sign-0n:
There are some additional steps you can do to enable single sign-on and point Windows Virtual Desktops to your ADFS environment.
See here.

